TL;DR:
- Plumber’s Putty: A clay-like compound that creates watertight seals around plumbing fixtures; stays soft and malleable.
- Best For: Non-porous materials (metal, ceramic); avoid on plastics and porous surfaces.
- Applications: Sealing faucets, shower drains, sink strainers, and tub drains.
- Application Steps: Turn off water, disassemble, clean surfaces, shape putty, apply, reassemble, and check for leaks.
- Plumber’s Putty vs. Silicone: Putty is quick and flexibly seals non-porous surfaces; silicone is for lasting seals on plastic/porous materials.
- Common Mistakes: Using on wrong materials, improper cleaning, and not testing for leaks.
- Tips: Use gloves, keep putty rope thickness even, and clean excess immediately.
Struggling to get a perfect watertight seal around your bathroom fixtures? Knowing how to use plumber’s putty can make all the difference for both beginners and pros. This soft, moldable compound is great for sealing faucets, sink drains, and more—plus, it doesn’t need any drying time. In this article, you’ll learn how to apply plumber’s putty to keep your fixtures leak-free. Whether you’re putting in a new bathtub drain or fixing an old sink strainer, this skill will help keep water where it belongs—inside the pipes!
Understanding Plumber’s Putty and Its Applications
Plumber’s putty is a handy, clay-like compound that’s great for making watertight seals around plumbing fixtures. It’s soft and doesn’t dry out, so it’s ideal for quick fixes and easy to work with. Its strong grip keeps leaks away. Just remember, it’s best on non-porous materials like metal and ceramic—avoid using it on plastic or porous surfaces since it can cause damage.
Safety first when working with plumber’s putty: wear gloves to protect your skin, and work in a well-ventilated space. With these tips, you’ll see why plumber’s putty is a favorite for both pros and DIYers, helping you get reliable results on plumbing projects.
Some common applications include:
- Sealing around faucets
- Sink basket strainers
- Shower drains
- Pop-up tub drains
- Kitchen and bathroom sink installations
Step-by-Step Guide to Applying Plumber’s Putty
To apply plumber’s putty, start by setting up your workspace. Turn off the water supply to avoid spills. If needed, use a pipe wrench to take apart the drain pipe, and keep a bucket handy for any leftover water. Make sure all surfaces, especially where the drain meets the sink or tub, are clean and dry so the putty sticks well.
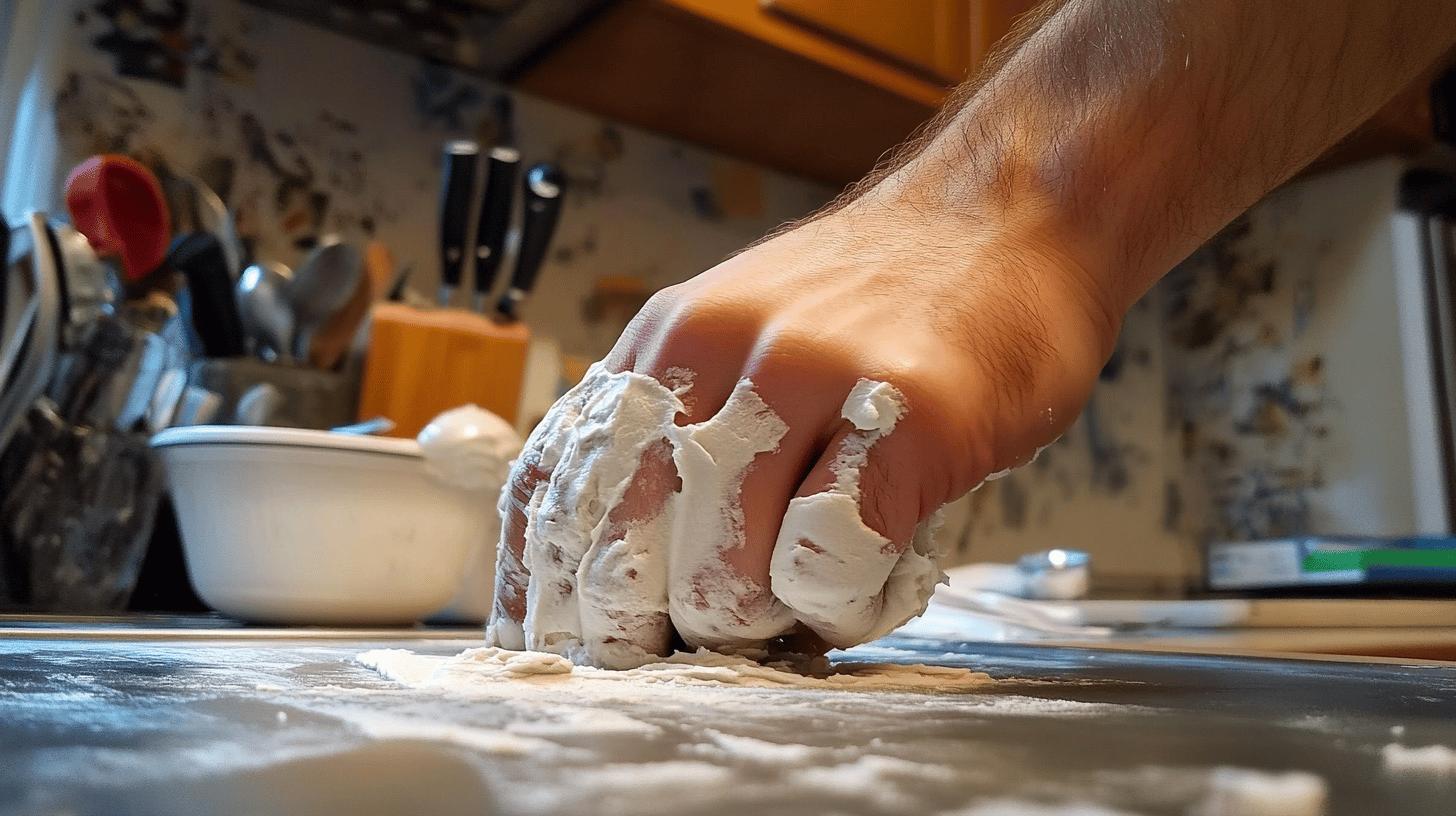
Warm the putty by rolling it between your hands until it’s soft, then shape it into a rope about 1/8 to 1/4 inch thick. Make sure it’s long enough to go around the base of the fixture. Place the putty around the opening where the fixture meets the sink or tub, pressing firmly to form a seal. Reassemble the pipe, then check for leaks by filling the basin with water. If there’s no leakage, your seal is solid.
Steps:
- Turn off the water supply
- Disassemble the drain pipe
- Clean and dry surfaces thoroughly
- Warm, shape, and apply the putty
- Reassemble and check for leaks
Plumber’s Putty vs. Silicone: Understanding the Differences
What’s the difference between plumber’s putty and silicone? Plumber’s putty stays soft and doesn’t need drying time, making it great for quick, flexible seals on things like stainless-steel fixtures. Silicone, on the other hand, hardens and takes 8 to 24 hours to cure, so it’s better for creating permanent seals. Silicone works well on plastics and porous surfaces, which plumber’s putty isn’t suited for.
So, when should you use each? Go with plumber’s putty for fast, adjustable seals on non-porous surfaces like stainless steel. Avoid it on plastics. For strong, lasting seals on plastic or porous surfaces, silicone is the way to go.
| Feature | Plumber’s Putty | Silicone |
|——————|————————-|———————|
| Curing Time | None | 8-24 hours |
| Flexibility | Stays soft | Hardens |
| Best Use | Stainless steel | Plastic/Porous |
Common Mistakes and Troubleshooting with Plumber’s Putty

Common mistakes with plumber’s putty include using it on the wrong materials, like porous or plastic surfaces, where it doesn’t work well. Not cleaning the area properly beforehand can also lead to a weak seal, as dirt or moisture can keep the putty from sticking.
To troubleshoot, start by cleaning the surface thoroughly. If you’ve put it on an unsuitable material, remove it right away to prevent damage. Don’t overdo it with the putty; applying too much can just make cleanup harder. After you’re done, check for leaks by filling the fixture with a bit of water. If there’s a leak, take it apart, clean, and reapply.
Common issues include:
- Using on inappropriate materials
- Not cleaning surfaces thoroughly
- Overusing putty
- Not testing for leaks
When Not to Use Plumber’s Putty
Don’t use plumber’s putty on plastic or porous materials, as it could damage them. It’s also not meant for pressurized connections since it can’t hold under pressure. Be careful with decorative countertops that stain easily, as putty might leave marks. Always check compatibility before applying to avoid issues.
- Avoid on plastic or porous surfaces
- Not for pressurized fittings
- Use caution on decorative countertops
Professional Tips for Using Plumber’s Putty

To get the best seal with plumber’s putty, keep the putty rope evenly thick, around 1/8 to 1/4 inches, so it forms a consistent seal. Use a putty knife to shape and press it firmly into place for a tight fit with the fixture. Wipe away any extra putty right away for a clean, finished look.
For safety, wear gloves to protect your skin from irritation and work in a well-ventilated space to avoid inhaling fumes. After applying, test by filling the fixture with water to check for leaks and ensure a solid seal.
Key points:
- Use gloves and ventilate the area
- Keep putty rope evenly thick
- Clean up excess quickly
- Test seals thoroughly before finishing installation
Final Words
Using plumber’s putty is a reliable way to create watertight seals in plumbing jobs, like sealing faucets and sink drains. It’s versatile and works for a range of tasks when applied properly.
Deciding between plumber’s putty and silicone depends on your project needs. Knowing where each sealant works best helps you choose wisely.
Avoid common mistakes, like using putty on materials it doesn’t suit, such as plastic, to keep everything running smoothly. With the right tips, you’re ready to use plumber’s putty effectively and get solid results for your plumbing needs.
FAQ
Q: How should you apply plumber’s putty to a sink drain?
A: Applying plumber’s putty to a sink drain involves turning off the water supply,
disassembling the drain pipe,
ensuring surfaces are clean and dry,
shaping putty into a rope,
applying it to the fixture base,
and reassembling.
Q: When should you not use plumber’s putty?
A: Plumber’s putty should not be used on plastic or porous surfaces,
pressurized connections,
or where it can stain decorative countertops.
Q: How long before plumber’s putty can get wet?
A: Plumber’s putty can get wet immediately after application
as it doesn’t require curing time to be effective.
Q: Can you use water right after applying plumber’s putty?
A: Yes, you can use water right after applying plumber’s putty
since it doesn’t need to dry before forming a watertight seal.
Q: How do plumber’s putty and silicone differ?
A: Plumber’s putty remains soft with no curing time and suits stainless steel,
while silicone hardens,
requires 8-24 hours to cure,
and is best for plastic or porous materials.
Q: Does plumber’s putty harden over time?
A: No, plumber’s putty does not harden.
It stays soft and malleable, maintaining its sealing properties over the years.
Q: What are some common mistakes with plumber’s putty?
A: Common mistakes include using on inappropriate materials,
not thoroughly cleaning surfaces,
overusing putty,
and not testing for leaks after application.
Q: How do you use plumber’s putty to stop a leak?
A: Use plumber’s putty by cleaning the area,
forming a putty rope,
applying it around the fixture base,
and tightening everything to create a watertight seal.