Water Shut Off Valve: Top 5 Essential Tips for 2025
A water shut off valve is a crucial component in protecting your home from the often expensive and disruptive impacts of water damage. If a pipe bursts or a faucet leaks, you can stop the flow of water instantly with a simple twist of a valve.
- Quick Tip: Understanding where your home’s water shut off valves are located can save you from unnecessary water damage repair costs.
Water damage can quickly become a homeowner’s nightmare, leading to everything from structural harm to mold growth. Unnoticed or prolonged water exposure might even weaken the foundation of your home and inflate your repair bills. Fortunately, using leak detection systems alongside effective water shut off valves offers a safeguard.
Plumbing problems often arise unexpectedly, causing significant inconvenience and potential damage. Whether it’s a faulty appliance, a burst pipe, or an overflowing sump pit, these problems can often be alleviated or even prevented with smart valve placement and technology.

Understanding Water Shut-Off Valves
Water shut-off valves are essential for managing the flow of water in your home. They come in various types and configurations, each designed for specific needs and locations. Let’s break down the basics of valve types, their operation, and configurations.
Multi-Turn vs. Quarter-Turn Valves
Multi-turn valves are the traditional choice for many homes. They operate by twisting a handle multiple times to gradually open or close the valve. Inside, a rubber gasket presses against a seat to stop water flow when tightened. These valves are common but can wear out over time, especially if frequently adjusted.
Quarter-turn valves, on the other hand, are modern and efficient. With a simple 90-degree turn of the handle, you can quickly stop or start the water flow. Inside, a ball with a hole rotates to control the water passage. These valves are usually more reliable and durable, making them a preferred choice for many homeowners despite their slightly higher cost.
Valve Materials and Connections
The material of a water shut-off valve affects its performance and suitability for different plumbing systems.
Brass valves are the most common and reliable, known for their durability in residential plumbing. They are suitable for most fixtures in your home.
Plastic or polypropylene valves are lightweight and used in low-pressure applications like reverse osmosis systems or aquariums.
When it comes to connections, the type of pipe dictates the valve fitting:
- PEX fittings: These can be barbed, compression, or push-to-connect. Barbed fittings need a crimp ring and tool, while compression fittings require simple tools. Push-to-connect fittings are the easiest, needing no tools.
- Copper fittings: Options include compression, push-to-connect, and sweat fittings. Sweat fittings require soldering, which might be best left to professionals.
- CPVC connections: Threaded or push-to-connect fittings are used here.
The right choice of valve and connection can make a significant difference in the ease of installation and long-term reliability of your plumbing system. Always consider the specific needs of your home and consult with a professional if unsure.
In the next section, we’ll explore how to locate your home’s water shut-off valves, both inside and outside.
Locating Your Water Shut-Off Valve
Knowing where your water shut-off valve is can save you from a potential disaster. Whether it’s a leak or a scheduled repair, turning off the water supply quickly is crucial. Let’s explore where to find these valves both inside and outside your home.
Inside the Home
The main water valve inside your house is usually found along the perimeter of the home, particularly on the side facing the street. If you have a basement, follow the water distribution lines back to an exterior wall to locate the valve. In homes without basements, it might be hidden behind an access panel. These valves can be either multi-turn or quarter-turn, and knowing how to operate them is essential in emergencies.
Outside the Home
Outside, the water meter is typically located near the curb or sidewalk within your property lines. You may have to do a little digging to uncover it, as it can be hidden by dirt or shrubs. Once you find the meter, the street-level shut-off valve is located between the meter face and the curb.
To turn off this valve, you’ll need a curb key, a specialized tool that provides the leverage needed to turn the valve off. Carefully lift the meter cover, clear any debris, and use the curb key to rotate the valve until the water flow is stopped.

It’s important for every resident to know these locations to act swiftly during a plumbing emergency. The ability to shut off water quickly can prevent extensive damage from leaks or bursts. Keep a curb key handy and ensure everyone in your household knows how to use it.
In the next section, we’ll discuss how to fix and replace water shut-off valves, so you’re prepared for any situation.
How to Fix and Replace Water Shut-Off Valves
When a water shut-off valve starts leaking or fails to fully close, it’s time to either fix or replace it. Addressing these issues promptly can save you from bigger plumbing problems down the line. Let’s break down the common issues and solutions.
Common Issues and Solutions
Leaking Valves
Leaks are often due to worn-out washers or seals, especially in multi-turn valves. Mineral buildup or rust can also cause the valve to not close fully, leading to persistent drips.
Valve Repair Steps
- Turn Off the Main Water Supply: Start by shutting off the main water valve to prevent any water flow during repairs.
- Drain the System: Open nearby faucets to relieve pressure and drain any remaining water.
- Remove the Handle: Use a Phillips screwdriver to take off the handle of the valve.
- Loosen the Retention Nut: With an adjustable wrench, carefully unscrew the nut to access the valve stem.
- Replace the Stem or Washer: If it’s a minor issue, replacing a worn washer or stem might solve the problem. A stem repair kit can be handy for this.
- Reassemble the Valve: Tighten the retention nut, reattach the handle, and test for leaks by turning the water back on.
Tip: Protect yourself with gloves and goggles during this process.
Replacement Process
If the valve is corroded or the repair doesn’t fix the issue, replacement might be necessary. Here’s how to do it:
- Select the Right Valve: Choose between brass, plastic, or other materials based on your plumbing system. Ensure compatibility with your pipe type, like PEX or copper.
- Remove the Old Valve: Use slip-joint pliers or a pipe wrench to detach the existing valve from the supply line.
- Install the New Valve: Attach the new valve using the appropriate connection method. For PEX, a push-to-connect fitting is simple and tool-free.
- Secure the Connection: Tighten all fittings and ensure the valve is positioned correctly.
- Test the Installation: Turn the water supply back on and check for leaks around the new valve.
DIY Tips
- Always have a few basic tools on hand: adjustable wrench, pliers, and a stem repair kit.
- If you’re unsure about the repair, consult a professional plumber to avoid causing further damage.
Professional Help
While many homeowners can tackle minor repairs, there are times when calling a plumber is the best course of action. Persistent leaks, complete valve failure, or complex installations are situations where professional expertise can ensure a reliable fix.
In the next section, we’ll dive into frequently asked questions about water shut-off valves, helping you understand more about their appearance, location, and maintenance.
Frequently Asked Questions about Water Shut-Off Valves
Where is the main water shut off valve in my house?
Locating your main water shut-off valve is crucial for emergency preparedness. Typically, this valve controls the water supply for your entire home. Common locations include:
- Basement: Often near the front foundation wall.
- Crawlspace: Look along the perimeter where the water line enters.
- Utility Room: Near the water heater or other main utilities.
If your home is on a slab, the valve might be in the garage or close to the perimeter where the plumbing enters. Identifying this valve quickly can prevent extensive water damage during a leak.
What does a water supply shut off valve look like?
Water supply shut-off valves come in various shapes and sizes, but they are generally easy to identify. Here are some key features:
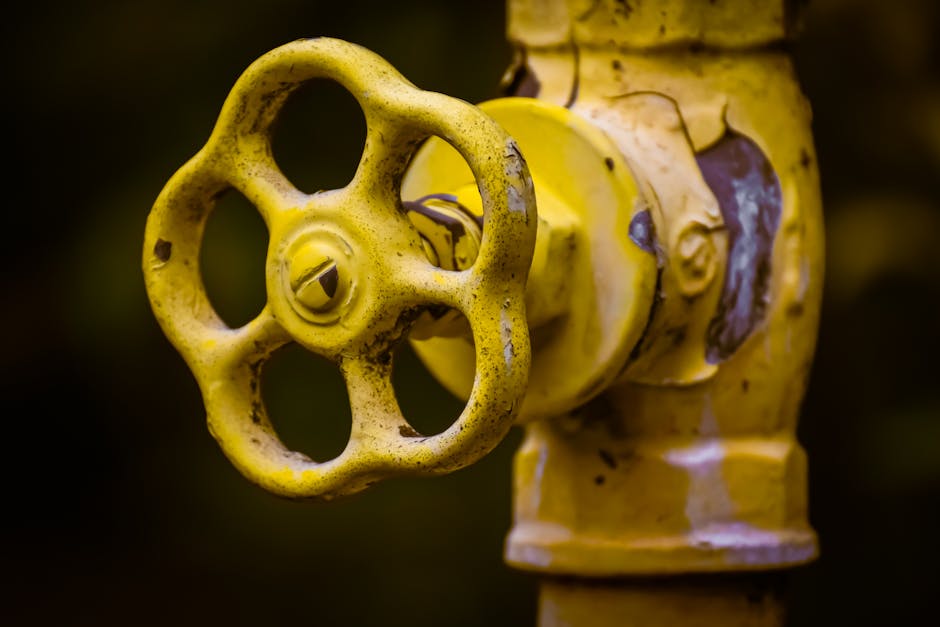
- Shape: Most valves have a round handle (multi-turn) or a lever handle (quarter-turn).
- Material: They are usually made of brass, plastic, or stainless steel.
- Labeling: Some valves may have labels indicating “on” or “off” positions, aiding in quick identification.
Multi-turn valves require several rotations to open or close, while quarter-turn valves operate with a simple 90-degree turn. Familiarizing yourself with these appearances can help in identifying them during an emergency.
How do you fix a water shut off valve?
Fixing a water shut-off valve can be a straightforward task with the right tools and steps. Here’s a simple guide:
Repair Steps:
- Turn Off the Main Water Supply: Before starting any repair, make sure the main water valve is closed.
- Drain the Line: Open a nearby faucet to release any remaining water pressure.
- Remove the Valve Handle: Use a screwdriver to take off the handle, revealing the valve stem.
- Loosen the Retention Nut: With an adjustable wrench, carefully unscrew the nut to access the internal components.
- Replace Components: Swap out any worn washers or stems. A repair kit can be helpful for this.
- Reassemble and Test: Reattach the handle, turn the water back on, and check for leaks.
Tools Needed:
- Adjustable wrench
- Screwdriver
- Replacement kit (washers and stems)
If a simple repair doesn’t resolve the issue, it might be time to replace the valve entirely. Always ensure you have the correct replacement valve that matches your pipe type and size.
For persistent problems or if you’re uncomfortable with DIY repairs, seeking help from a professional plumber is advisable. They can ensure the job is done safely and effectively, preventing future issues.
Conclusion
At Integrity Services & Plumbing, we focus on our plumbing skills and dedication to top-notch service. We know how crucial a reliable water shut-off valve is for keeping your home safe and running smoothly.
Our team is dedicated to providing top-notch plumbing solutions for both residential and commercial clients. We know that dealing with plumbing issues like leaks or faulty valves can be stressful, and our goal is to make the process as smooth as possible for you. Whether it’s a simple valve repair or a complete system overhaul, we bring honesty, respect, and excellence to every job.
Understanding your home’s plumbing system and knowing how to locate and operate your water shut-off valves can save you from potential water damage and costly repairs. We are always here to help, offering professional guidance and services custom to your needs.
For any plumbing concerns or emergencies, don’t hesitate to reach out to us. Let Integrity Services & Plumbing be your trusted partner in maintaining the safety and functionality of your home’s plumbing system.

