
TL;DR:
- Understand plumbing layout before tying in.
- Key considerations: sewer connections, pipe limits, fixture layout, local codes.
- Tools needed: utility knife, reciprocating saw, no-hub couplings, torque wrench, rubber couplings, adhesive.
- Tying in steps: turn off water, cut pipe, use couplings, tighten connections, test for leaks.
- Pipe types: PVC (standard couplings), Cast Iron (banded couplings), Copper (soldered/compression).
- Safety: turn off water, wear gear, work in ventilated areas.
- Common mistakes: not turning off water, poor sealing, over-tightening, ignoring codes.
- Hire a plumber for complex projects or when unsure for professional compliance.
Ready to take on the plumbing challenge in your home? Connecting to your existing plumbing can seem tricky, but it’s totally doable with the right info. Knowing how to read plumbing diagrams, understanding your home’s layout, and being aware of local codes is essential for a successful project. By mastering these basics, you can dodge common mistakes and make sure everything goes smoothly, whether you’re adding a new fixture or rerouting pipes. This guide will walk you through practical steps and tips to help you tackle the process confidently and efficiently. Let’s break it down and make tying in plumbing easy!
Understanding Plumbing Systems for Tying In
Before you connect to your existing plumbing, it’s important to get a grasp on your home’s plumbing layout. Plumbing diagrams illustrate how water flows through your home, showing the connections between fixtures and the main sewer line. These diagrams help you figure out where you can add new fixtures without causing issues in the system. By examining them closely, you can identify potential challenges, like the capacity of drain-waste-vent pipes. This knowledge helps you avoid overloading the system, which could lead to poor drainage or backups.
Key elements to consider are:
- Connection to sewer lines
- Drain-waste-vent pipe limits
- Water supply line locations
- Plumbing fixture layout
- Local plumbing codes
Plumbing codes are important for safety and ensuring everything works properly. They outline how plumbing systems should be designed and installed. Following these codes isn’t just about legality; it helps prevent problems like leaks and inefficiencies. By understanding these codes, you can better assess whether your project is doable on your own or if you need to bring in a plumber.
Tools and Materials Needed for Plumbing Integration

Picking the right tools and materials is super important. Your project’s success relies on having the right equipment. Whether you’re connecting pipes or choosing materials, the right tools help you make precise cuts, secure connections, and keep the system reliable. Good tools also help cut down on mistakes and make the whole process smoother.
- Utility knife
- Cordless reciprocating saw
- Fine tooth blade
- No-hub coupling
- Torque wrench
- Rubber couplings
- Plumbing adhesive
Each tool serves a specific purpose. A utility knife is great for cutting and trimming materials neatly. A cordless saw with a fine-tooth blade makes accurate cuts on PVC. No-hub couplings let you make slight adjustments during connections. A torque wrench ensures tightness to the right level, which helps prevent leaks. Rubber couplings securely connect pipes, while adhesive keeps everything watertight.
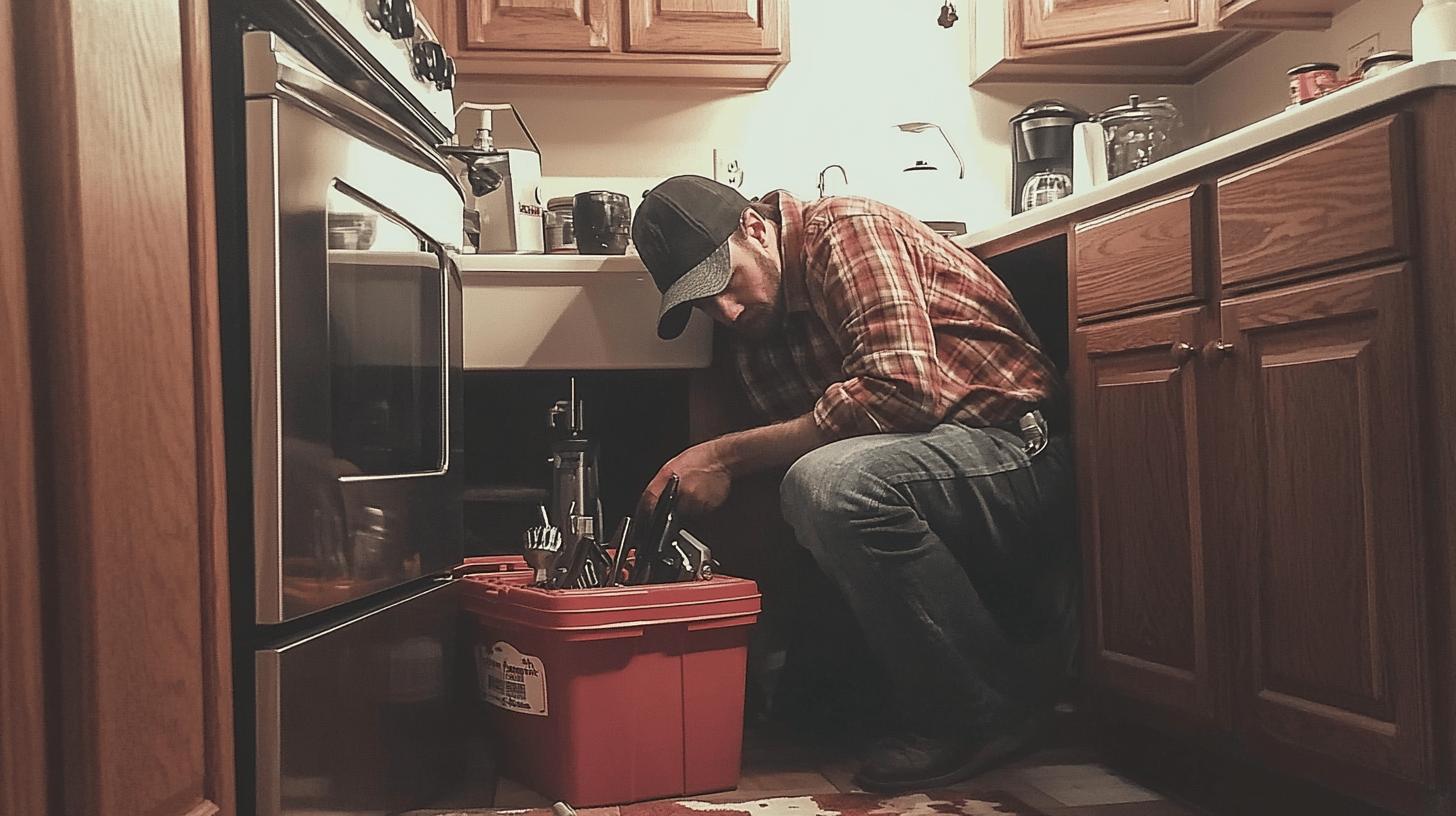
Step-by-Step Guide to Tying In Plumbing Systems
To connect to existing plumbing, follow a step-by-step process. This helps avoid mistakes and ensures everything is done right for a reliable connection. Sticking to a guide keeps things straightforward and ensures smooth integration.
Steps to effectively tie in plumbing:
- Turn off the water supply to prevent leaks.
- Locate the new service area for plumbing integration.
- Use a saw with a fine tooth blade to cut a section of the drain pipe.
- Insert rubber couplings on pipe ends for a flexible connection.
- Align the new pipe with the existing system.
- Mark coupling lengths for accurate placement.
- Slide couplings to secure the new pipe.
- Tighten connections with a torque wrench.
- Test for leaks by turning water on.
- Ensure all joints are tight and watertight.
Once you’ve finished the steps, make sure to test everything thoroughly to see if all connections can handle regular pressure. This helps you catch any issues right away, ensuring your plumbing system lasts a long time.
Dealing with Different Pipe Types and Scenarios

Understanding different pipe types is essential. PVC pipes are popular in modern homes because they’re lightweight and easy to install. You can extend them easily with standard tools. On the other hand, cast iron pipes are heavier and require special methods for installation. They need banded couplings to make secure connections, and you have to handle them carefully to avoid leaks and structural problems.
| Pipe Type | Connection Method |
|—————-|————————–|
| PVC | Standard couplings |
| Cast Iron | Banded couplings |
| Copper | Soldered or compression |
Follow local plumbing codes when making adjustments to your systems. These codes are in place to ensure safety and efficiency, helping to prevent contamination or poor water flow. This is especially important with cast iron pipes to avoid potential damage. Checking local regulations or consulting a plumber can help you make sure your projects are both effective and compliant.
Safety Precautions and Common Mistakes
Turning off the water supply is a must for safety, as it helps prevent leaks during installation. Make sure to wear safety gear like gloves and goggles to protect yourself from hazards. It’s also important to work in a well-ventilated area to avoid inhaling any fumes. Putting safety first reduces risks when tackling plumbing projects.
Common mistakes include:
- Not turning off water
- Improper pipe joint sealing
- Over-tightening pipes
- Ignoring local codes
- Skipping leak tests
Troubleshooting means figuring out what’s causing the problem. If you’re dealing with leaks or slow flow, start by checking each joint to make sure they’re sealed correctly and not over-tightened. Also, make sure everything follows the plumbing codes to spot any mistakes. Inspect all joints under pressure to find any hidden leaks. Fixing these issues quickly helps your plumbing system last longer.
FAQs on Plumbing Integration
What are common issues during plumbing tie-ins?
Precision planning avoids issues like joint sealing errors or pipe misalignment, which cause leaks. Accurate measurements and code adherence prevent problems. Hiring a plumber can ensure secure connections and compliance.
Why is troubleshooting challenging for DIYers?
DIY projects often lack precision. Inadequate tools and experience lead to errors. Professional plumbers have the expertise to identify and resolve issues efficiently, saving time and preventing damage.
When should I hire a plumber?
Hire a plumber for complex projects. Professionals handle intricate systems, ensuring code compliance. Their skills minimize costly mistakes and provide peace of mind. For large renovations or new systems, a plumber’s expertise is invaluable.
Final Words
Understanding plumbing diagrams, selecting the right tools, and knowing how to connect pipes securely are key steps for successful plumbing integration. Familiarizing yourself with your home’s plumbing layout and following local codes will set you up for any plumbing project.
Paying attention to different pipe materials and sticking to safety precautions can help you avoid expensive mistakes. Whether you’re doing a DIY project or hiring a pro, knowing how to tie in plumbing effectively ensures your home’s plumbing system remains reliable and efficient.
Use these strategies to improve your plumbing efforts.
FAQ
How do you tie into an existing drain line?
Connecting to an existing drain line involves identifying the appropriate section, cutting it, and adding new pipes with couplings.
Ensure all connections comply with local plumbing codes.
How to tie into a sewer line in the basement?
Begin by planning the layout and identifying the sewer pipe.
Use a cutting tool for precise cuts and attach new lines with rubber couplings.
Consult local regulations to ensure compliance.
How do you connect drainage pipes together?
To connect drainage pipes, measure and cut piping as needed.
Use couplings or fittings to join them securely and check for leaks once the connection is complete.
How can you tie into an existing toilet drain?
Tying into a toilet drain involves locating the specific area, cutting the drain pipe, and using proper fittings to add new pipes, ensuring a tight seal to prevent leaks.
How to tap into existing PVC drain pipes?
Tapping into a PVC drain requires cutting the correct section, adding tee fittings or couplers, and securing them with adhesive to ensure a leak-proof connection.
Can you join two drain pipes together?
You can connect two drain pipes by selecting the appropriate coupling or fitting, ensuring cuts are straight, and securing them with adhesive or clamps for tightness.
How do you tap into an existing water line?
To tap into a water line, shut off the main supply, cut the line, attach a tee fitting, then run new piping, ensuring seals are secure to withstand water pressure.
How do you join plumbing pipes?
Joining plumbing pipes involves using the right couplings or fittings, ensuring precise cuts, and sealing connections with adhesives or plumber’s tape to prevent leaks.
How to tee into a drain pipe?
Teeing into a drain pipe involves cutting the appropriate section of the line, inserting a tee fitting, and securing with appropriate couplings or fittings for a robust connection.