
TL;DR:
- Phases of Plumbing Installation: Rough-in, setting large fixtures, connecting fixtures.
- Essential Tools: PEX crimp tools, pipe wrenches, hacksaws, torpedo levels.
- Materials: PVC ($0.50-$2.00/ft), Copper ($2.00-$10.00/ft), PEX ($0.40-$2.00/ft).
- Typical Costs: $1,500-$15,000 for installation; labor rates $50-$150/hr; permits $50-$500.
- Safety Tips: Use gloves/goggles, ensure ventilation, turn off water supply, adhere to codes.
- Key Components: Pipes, fittings, fixtures, valves, regulators; PEX is flexible and easy to install.
- Blueprint Importance: Aids in accurate installation and prevents costly errors.
Ever wondered why some homes have plumbing that works perfectly while others always have leaks and clogs? Knowing the main steps in plumbing installation can really help. In this article, we’ll go through each important phase—from the initial rough-in to connecting the final fixtures—so you understand how to set up a plumbing system without any issues. Whether you’re building a new house or fixing up an old one, knowing these steps can save you time and cash. Let’s get into the essential parts of plumbing installation and simplify it all!
Understanding the Phases of Plumbing System Installation
The plumbing installation process has three main steps: rough-in, installing big fixtures, and connecting everything.
Rough-In Phase
The rough-in phase happens after the framing is done but before the drywall goes up. This is when the main drains are installed and linked to the stack. It’s super important because it lays the groundwork for the whole plumbing system. Getting the measurements and alignment right is key to making sure all the pipes are in the right spots and securely attached.
Setting Large Fixtures
Large fixtures like showers and bathtubs are installed before the walls and doorways are framed. This makes it easier to access the plumbing connections without the finished walls getting in the way. Setting these fixtures early helps prevent problems that could come up if you try to fit them in after the walls are up.
Connecting Fixtures
Once the walls and flooring are done, smaller fixtures like sinks and toilets are installed. In this phase, all fixtures get connected to the water supply and drainage systems. Making these connections correctly is super important to ensure everything works well and to avoid leaks.
The installation process involves several interconnected steps:
- Drilling Holes: Holes must be drilled to allow pipes to pass through walls and floors without damaging the structure.
- Laying Out Fittings: Accurate fitting layout ensures all components align perfectly.
- Positioning Components: Proper positioning is essential for effective plumbing system function.
By knowing and following these steps, you can make sure the plumbing system installation goes smoothly and efficiently.
Essential Tools and Materials for Plumbing Installation
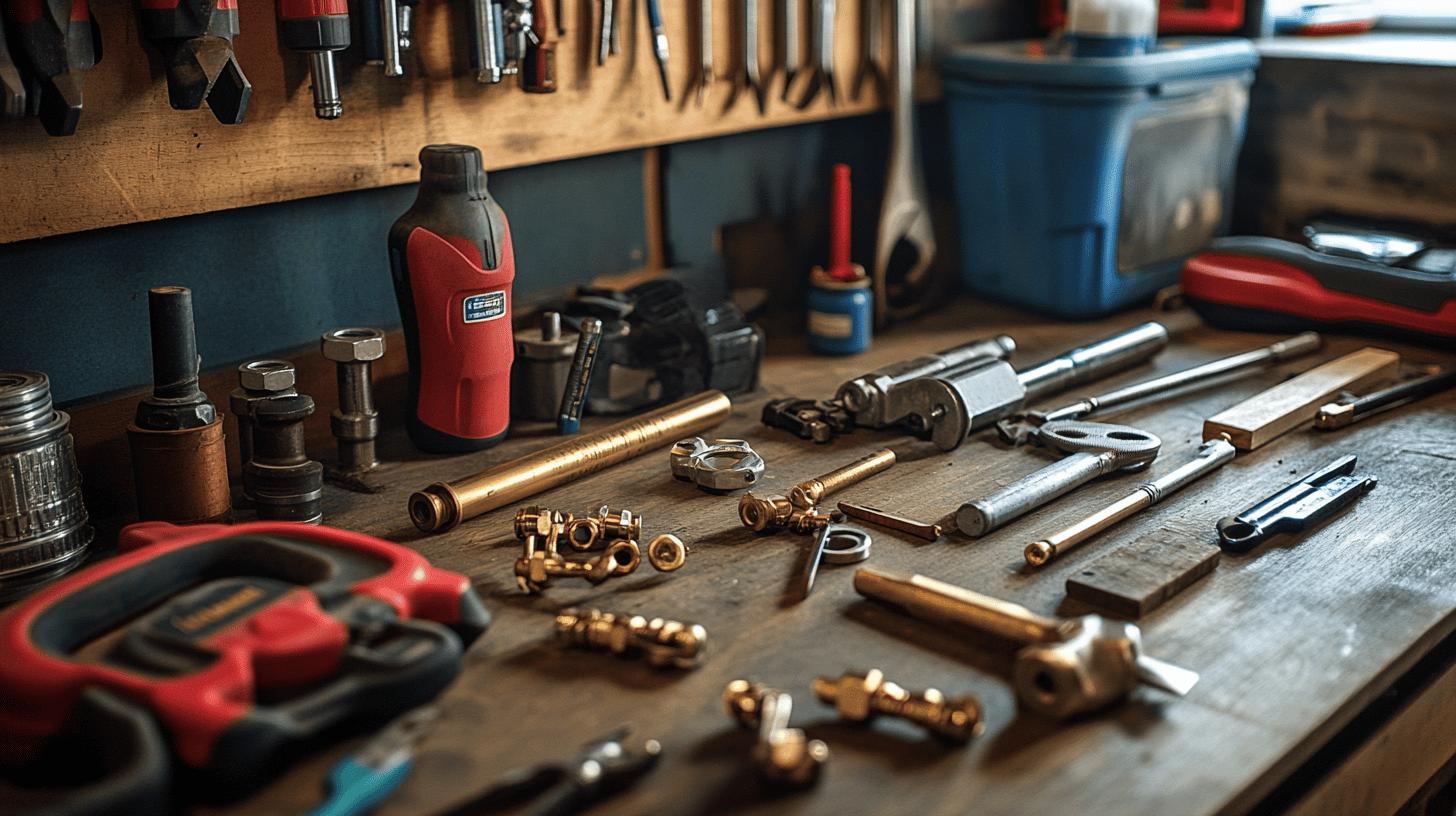
Essential Tools for Plumbing Installation
Some key tools you’ll need are PEX crimp tools, pipe wrenches, hacksaws, and torpedo levels. These tools are essential for cutting, fitting, and aligning pipes and fittings correctly.
Importance of PEX Crimp Tools
PEX crimp tools are used to secure connections in PEX piping, making sure they’re watertight.
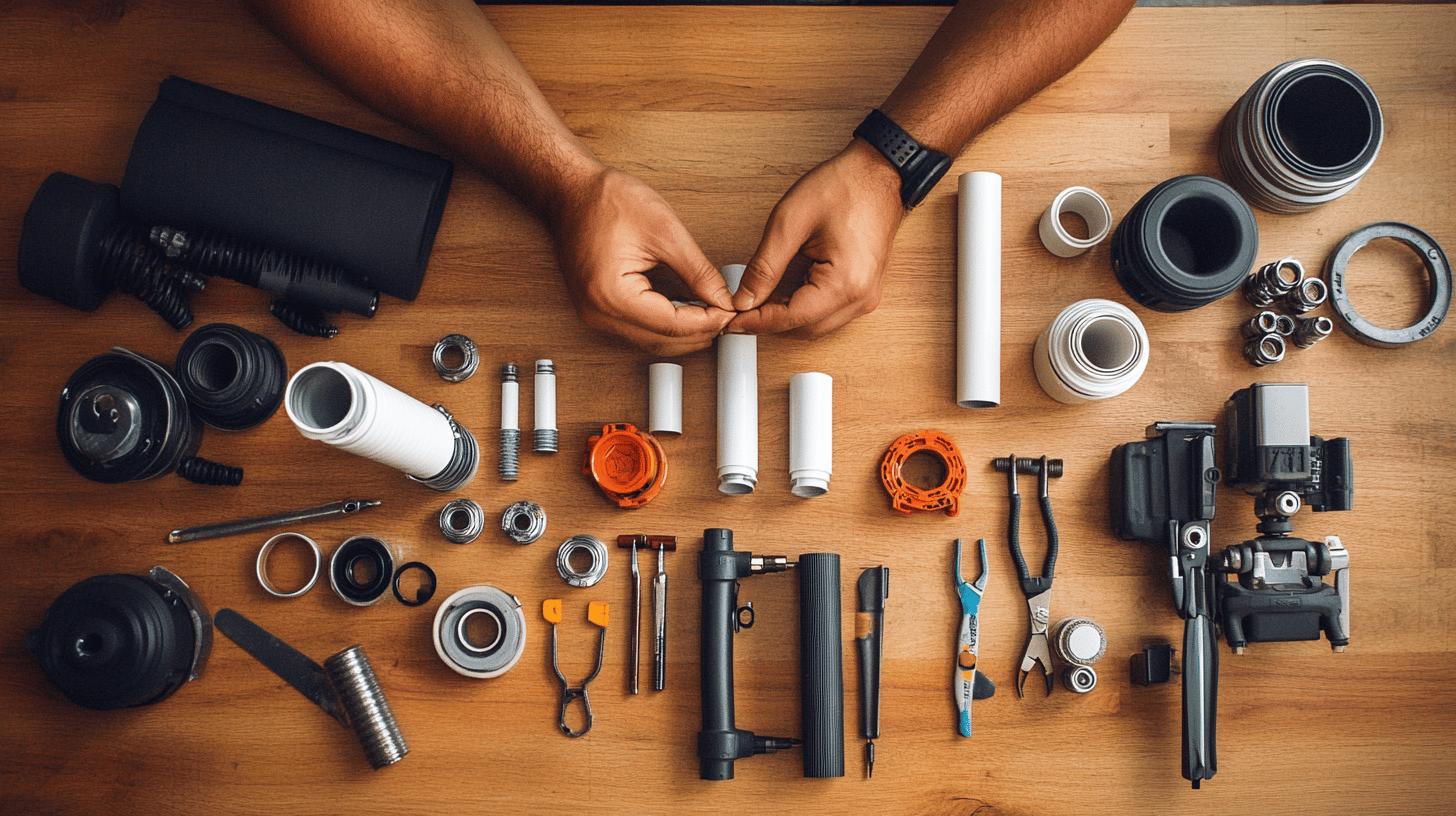
Materials Used in Plumbing Installations
Common materials for plumbing include PVC pipes, copper pipes, PEX pipes, and different types of fittings and fixtures.
Differences Between PVC and Copper Pipes
PVC pipes are lightweight, resistant to corrosion, and easy to install, making them great for drainage systems. Copper pipes are durable and can handle high temperatures, which makes them perfect for water supply lines.
Advantages of PEX Pipes
PEX pipes are flexible, resistant to scale and chlorine, and easier to install than rigid pipes. They are ideal for retrofitting and can reduce the number of fittings needed.
Common Fittings and Fixtures
Fittings like elbows, tees, couplings, and valves help connect and direct the flow in the plumbing system. Fixtures such as faucets, sinks, and toilets are where the water actually comes out.
Importance of Selecting the Right Materials
Choosing the right materials is key for making your plumbing system last and work efficiently. The right materials help prevent leaks, corrosion, and other problems that can mess with performance.
How to Choose the Right Materials
Think about the type of fluid, temperature, pressure, and what you specifically need for your application. Getting advice from a pro can help you make the best choices. By knowing and using the right tools and materials, you can have a smooth and efficient plumbing installation.
Cost Breakdown of Plumbing System Installation
Factors Influencing the Cost of Plumbing Installation
Costs can change depending on the project’s size, location, materials, and labor rates.
Typical Residential Installation Costs
For a typical residential installation, costs usually fall between $1,500 and $15,000.
Primary Cost Components in Plumbing System Installation
The cost breakdown includes material expenses, labor, permits, and any unexpected costs that might come up.
Material Costs
Material costs depend on the type and quality of pipes, fittings, and fixtures you choose. Here’s a rough estimate:⬤
Material Costs
| Material | Cost Range |
|---|---|
| PVC Pipes | $0.50 – $2.00 per foot |
| Copper Pipes | $2.00 – $10.00 per foot |
| PEX Pipes | $0.40 – $2.00 per foot |
| Fixtures (e.g., faucets, sinks) | $150 – $1,500 each |
Labor Costs
Labor costs can add up and vary depending on how complicated the installation is and the local rates.
Estimating Labor Costs
Usually, plumbing labor rates fall between $50 and $150 per hour, but for more complicated installations, these rates can go up.
Permit Requirements and Costs
You’ll often need permits for plumbing work, and they can cost anywhere from $50 to $500, depending on how big the project is and the local rules.
Unforeseen Expenses
Possible unexpected costs include:
- Unexpected Repairs: Repairs to existing plumbing.
- Upgrades: Costs for higher-quality materials or fixtures.
- Inspection Fees: Additional fees for mandatory inspections.
Accurate Cost Estimation
Keep in mind the size, complexity, and specific needs of your project for a better cost estimate. Professional plumbers can give you accurate quotes based on your situation. By knowing these cost factors, you can plan your budget wisely and make smart choices for your plumbing installation.
Why Hiring Professional Plumbers is Essential
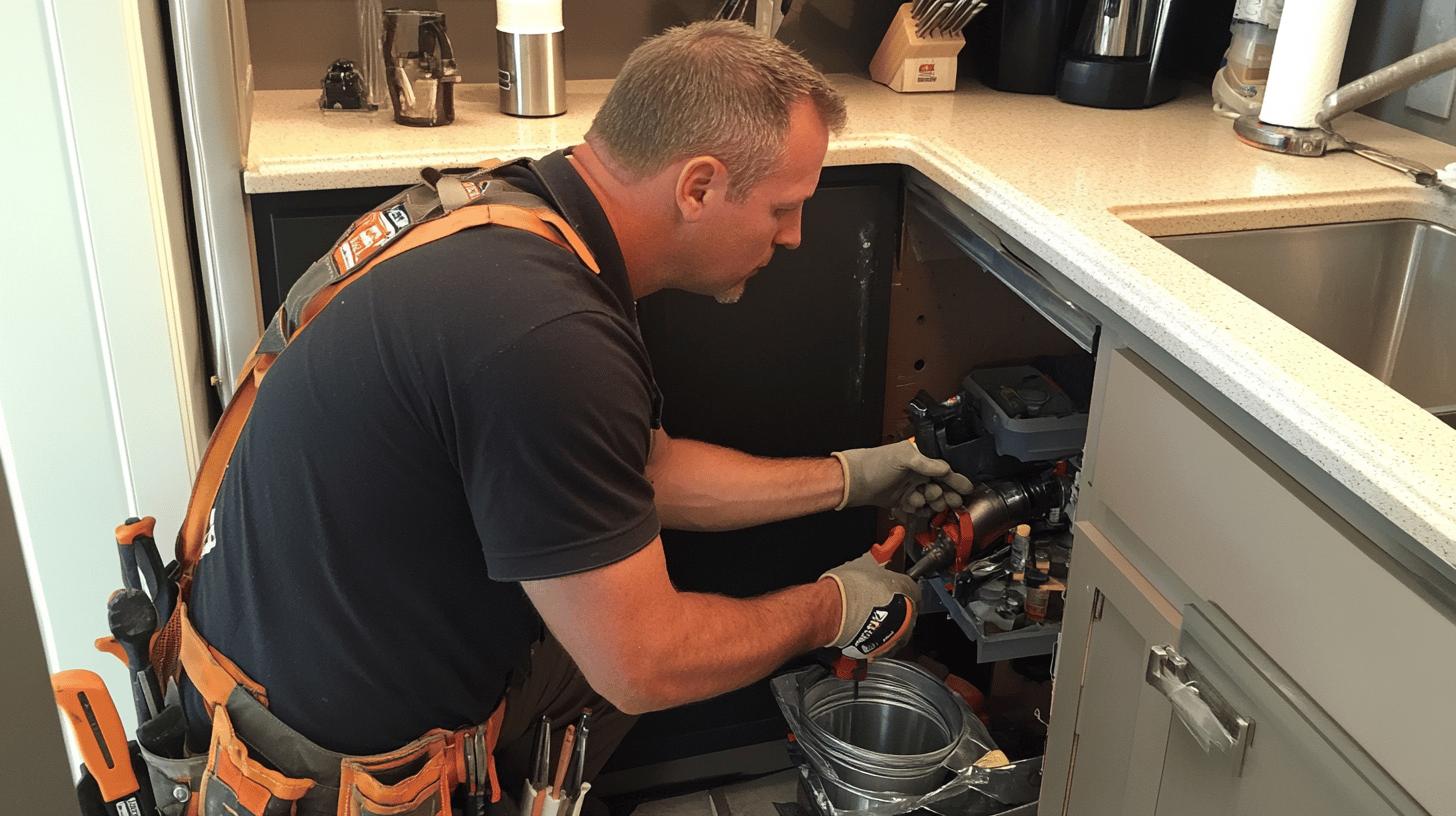
Benefits of Expert Plumbing Installations
Having professionals handle the job ensures everything is safe and works properly. Their experience and attention to detail help prevent future problems.
Advantages of Hiring Professional Plumbers
They have the skills and equipment to manage complicated installations and fix any issues that come up.
Ensuring Safety through Professional Installations
Professionals follow local codes and regulations, which helps avoid problems like leaks, water damage, and burst pipes.
Reliability of Professional Installations
Their training and experience guarantee that your plumbing system will last longer and work efficiently.
Handling Complex Installations
Experts know how to design and set up plumbing systems that work well, even in tight spots, and they make sure everything is lined up just right.
Specialized Tools Used by Professionals
They use tools like PEX crimp tools, pipe wrenches, and torpedo levels to make accurate cuts and ensure everything fits tightly.
Troubleshooting Skills
Professionals can quickly spot and fix problems using diagnostic tools that help find hidden leaks or blockages.
Investment Worthiness
Hiring a professional ensures the installation is done right from the start, which can save you money on expensive repairs later and help your plumbing system last longer.
Expectations from Professional Services
You can expect clear communication, upfront pricing, and a focus on quality when hiring professional plumbers. This ensures your plumbing system meets your needs and works perfectly. Choosing pros means you get a safe, reliable, and efficient system that lasts for years.
Safety Tips for Plumbing System Installation
Key Safety Tips for Installation
Following plumbing codes and regulations keeps your system safe and compliant with local rules. These codes help prevent accidents and protect public health.
Importance of Protective Gear
Always wear gloves, goggles, and masks to protect yourself from harmful chemicals and sharp tools.
Proper Ventilation
Good ventilation helps keep harmful fumes from building up and ensures fresh air, reducing the risk of respiratory problems.
Turning Off the Water Supply
Shutting off the water supply before you start working helps prevent accidental flooding and water damage.
Necessity of Permits and Regulations
Getting permits and following regulations ensures that safety standards are met. Inspections by qualified professionals check for compliance, which helps the system last longer.
Ensuring Compliance with Codes
Get to know the local codes before you start your project. Talking to a professional plumber can give you useful advice and help you avoid common mistakes. By following these safety tips, you can ensure a safe and successful plumbing installation.
Step-by-Step Guide to Installing Plumbing Pipes
First Step: Drilling Holes
Drill holes in walls, floors, or ceilings where pipes will pass through. Ensure holes are properly sized to avoid structural damage.
Ensuring Correct Positioning
Lay out fittings and pipes to ensure they align perfectly with the design.
Importance of Precise Measurements
Accurate measurements prevent misalignment, which can cause leaks or system failures.
Commonly Used Pipes
Choose between PVC, copper, and PEX pipes based on durability and application.
Handling Directional Changes
Use short pattern and long sweep 90-degree angles to adjust pipe direction, reducing clog risk and improving flow.
Rough-In Phase
Install basic lines after framing but before drywall installation, connecting main drains to the stack and securing pipes.
Connecting Pipes
Use appropriate fittings to connect pipes. Ensure connections are tight to prevent leaks, using pipe cement or solder as needed.
Ensuring Alignment
- Use a torpedo level to check horizontal and vertical alignment.
- Double-check measurements before cutting pipes.
- Dry-fit components before final assembly.
Essential Tools
- PEX Crimp Tools: Secure PEX piping connections.
- Pipe Wrenches: Tighten and loosen pipe connections.
- Hacksaws: Cut pipes to required lengths.
- Torpedo Levels: Check pipe alignment.
Common Materials
- PVC Pipes: Lightweight and corrosion-resistant.
- Copper Pipes: Durable and withstand high temperatures.
- PEX Pipes: Flexible and chlorine-resistant.
Finalizing Installation
Secure pipes with brackets or straps. Test the system for leaks by running water through it and checking all connections.
By following these steps and using the right tools and materials, you can ensure successful plumbing pipe installation.
Common Plumbing System Components
Main Components
Primary components include pipes, fittings, fixtures, valves, and regulators.
Types of Pipes
Common types are PVC, copper, and PEX. PVC is corrosion-resistant, copper is durable and withstands high temperatures, and PEX is flexible and easy to install.
Role of Fittings
Fittings like elbows, tees, and couplings connect and direct flow within the system.
Function of Fixtures
Fixtures like faucets, sinks, toilets, and showers provide user access to water.
Importance of Valves
Valves control water flow within the system, allowing shut-off for maintenance or emergency repairs.
Purpose of Regulators
Regulators maintain consistent water pressure, protecting fixtures and pipes from damage.
Water Supply System Function
The water supply system splits the main water line into branches, delivering water to various fixtures.
Hot Water Provision
Tank-based or tankless water heaters provide hot water. Dedicated hot water lines reduce wait time and improve efficiency.
Benefits of Dedicated Hot Water Lines
They reduce heat loss and improve delivery speed and consistency.
By understanding these components, you ensure a well-functioning, efficient, and reliable plumbing system.
Understanding Plumbing System Layouts and Blueprints
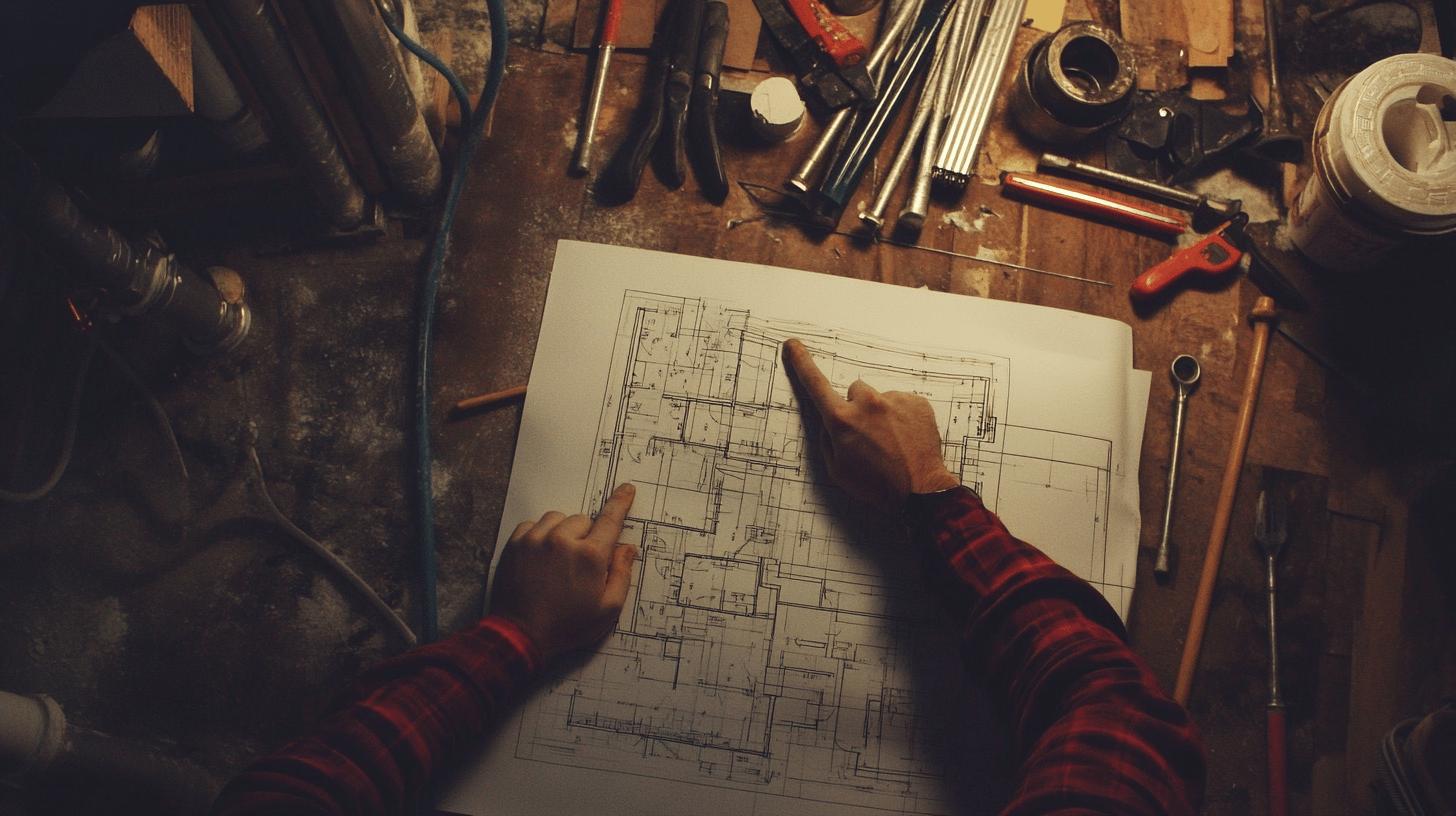
Importance of Layout and Blueprints
Understanding layouts and blueprints provides a clear visual guide for effective plumbing system installation.
Blueprint Assistance
Blueprints provide detailed instructions on component placement, ensuring accurate installation.
Benefits of Proper Blueprint Interpretation
Interpreting blueprints correctly prevents errors and misalignments, which can lead to costly repairs and inefficiencies.
Tips for Reading Blueprints
- Identify Symbols: Familiarize yourself with standard symbols representing components.
- Understand Scale: Translate blueprint dimensions to real-world measurements.
- Follow the Flow: Trace water flow to understand system operation.
- Check Specifications: Review component details like pipe size, material, and connection types.
- Consult Professionals: If uncertain, seek professional advice to ensure correct installation.
By mastering blueprint interpretation, you achieve a more efficient and accurate plumbing system installation.
Final Words
You explored the key phases of plumbing system installation, from rough-in to connecting fixtures, highlighting the critical steps and tools needed. Delving into costs and the importance of hiring professional plumbers, we provided a comprehensive view of the process.
Understanding the various components and safety tips ensures a smooth and compliant installation. Mastering plumbing layouts and blueprints further enhances accuracy and efficiency.
Approaching your plumbing system installation with this knowledge will pave the way for a reliable and efficient setup, ensuring lasting satisfaction.
FAQ
What is the cost of plumbing system installation?
The cost of plumbing installation varies widely based on project scope, location, materials, and labor. Generally, it ranges from $1,500 to $15,000 for typical residential installations.
What are the three types of plumbing systems?
The three types of plumbing systems are the potable water system, the sanitary drainage system, and the stormwater drainage system.
What is plumbing installation?
Plumbing installation refers to the process of setting up a system of pipes and fixtures to distribute water and remove waste in a building.
What are the three stages of plumbing installation?
The three stages are rough-in, setting large fixtures, and connecting fixtures. Rough-in involves laying basic lines; large fixtures are installed early; small fixtures are connected last.
What does the plumbing system include?
A plumbing system includes pipes, fittings, fixtures, valves, regulators, and water heaters. These components work together to deliver water and remove waste efficiently.
What is included in a plumbing system diagram?
A plumbing system diagram includes the layout of pipes, fixtures, drains, and vents. It visually shows how all components connect and function within the system.
How can I obtain a plumbing installation guide?
A plumbing installation guide is usually available in PDF format online from reputable sources, offering step-by-step instructions for residential or commercial installations.
What is the process of plumbing in construction?
The process includes the rough-in phase, which lays basic lines; setting large fixtures like bathtubs; and finalizing by connecting smaller fixtures to the main lines.
Why is hiring professional plumbers essential?
Hiring professional plumbers ensures safety, functionality, and reliability. They possess the skills, tools, and experience to handle complex installations and troubleshoot issues effectively.